Memories and photo improvement

Our photos are our visual memories – places we have visited, people we have met, events we have attended, … A small minority are destined for display but the vast majority will be stored digitally or on paper until we view them again to remember that special time. So what about that shot you take that does not come out as planned and although a reminder, it is not quite as you remember it?

When dealing with old photos, negatives and slides, there are often signs of deterioraton or wear-and-tear that can be corrected digitally – photo renovation. However, many of the same techniques can be used on a recent image to correct problems and make it more aligned to our memory – photo improvement.

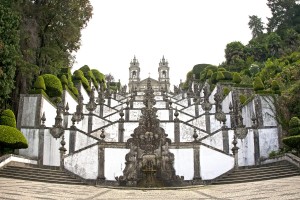
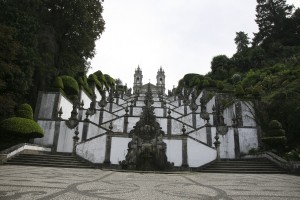
Recently I have worked on some holiday images that were OK as holiday snaps but not great reminders of a special location. Take, for example, this shot on the right of Bom Jesus, a famous site in North Portugal. The image isn’t quite straight and it is dull and lifeless with very little detail.

Taking the image into Photoshop, I used the Lens Correction filter to straighten the image and emphasise the centre by applying a small amount of distortion and adjusted shadows/highlights, brightness, contrast and colour. The result on the left is more engaging and much more like the memory of the day.

Most images that are not as you want them, can be improved by a few actions in your image improvement software. Not all images are worth improving but investing some time in the ones that will always remind you of that special occasion is well worth the effort.

Posted in Photo Renovation | Tagged , | Leave a comment

Giclée printing, can you see the difference?

The term giclée (pronounced zhee-klay) printing is one that has become widely used in recent years as a shorthand for high quality or fine art printing but what is it?

There is no unique process associated with giclée printing. The term is derived from the French for a jet or a spray (un gicleur) and the verb ‘to spray’ (gicler) and it refers to the use of an inkjet printer similar to ones used in homes around the world. The difference is that giclée prints are produced on advanced ‘large format printers’ using archival quality inks and paper or canvas.

Large format printers are capable of printing very fine detail and use eight or more colours including a variety of grey/blacks giving a better grey balance and tonal control for black and white images plus a very wide colour capability for colour images. They can also print on a wide variety of materials including textured through to very smooth fine art papers, matte through to ultra glossy paper finishes, medium paper weight through to heavyweight card and canvas.

So that’s the basis of giclée printing but is it worth the money? There is no doubt that a well produced giclée print gives a fantastic result in terms of clarity, detail and colour rendition plus the archival quality of the paper and inks means that it will last for tens of years (there are claims of over 100 years) without fading. This, plus the ability to produce in very small quantities, is why photographers and artists often turn to giclée printing rather than lithograph printing when reproducing prints for sale. Also, for the home or for gifts, giclée prints are a great way to display or share images that look fantastic and last for years.

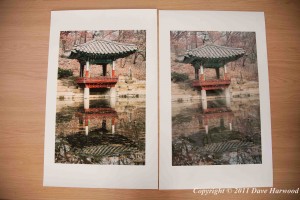
Giclée print 1

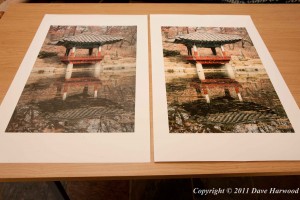
I titled this posting, can you see the difference? The answer is a definite yes over a ‘standard’ photo print. Although this is dificult to show on the screen, I shot these images earlier as even at low resolution the difference is evident. One of the prints is a ‘standard’ print on glossy archive paper, the other is a giclée print we produced of the same image. The two shots have the prints reversed to try to reduce the imapct of light reflection from the glossy print in our glass-roofed studio – another advantage of using fine art papers in my mind as they are not ultra glossy and hence do not reflect light as much. I hope you can see the difference!

Giclée print 2

Lastly and maybe most importantly, I am not aware of any standards for giclée or fine art printing. If you want to get some of your images enlarged and printed in this way, make sure you talk to a giclée specialist about the printer(s) and paper(s) they use and because this is not an automated process, the person printing the image has a big impact on the quality of the result. Talk to that person, be happy with who is doing the work and enjoy the result.

Posted in Printing | Tagged | Leave a comment

Renovating old photos

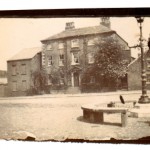
The process of restoring old photos to their former glory usually requires work at a very detailed level and can be time-consuming. I find that following the same process every time, reduces the overall time taken and the potential for rework.

The first step in the process is to obtain a good scan of the photographic material whether old photos, 35mm negatives or 35mm slides. Here, at Amber Photographics, the only cleaning we undertake is to use air pressure to remove dust, etc from the surface of the material before carefully loading in the scanner – Epson V750 Pro for prints and Nikon Coolscan 9000 for 35mm negatives and slides. I’d rather remove further marks digitally than risk touching what is often old and fragile material.

All material is scanned in colour with further dust or scratches removed digitally and I sometimes choose to turn on digital colour correction at the same time. Whether I use digital colour correction depends on the image and I decide on an individual basis often through previewing the scan. Once scanned, I bring the image into Photoshop and take some time to look at it in detail, decide on what needs doing and estimate the effort involved. I think that this is an important step as it gives me time to understand what I am trying to achieve. For example, deciding at this stage to crop the image in a certain way can save renovation time and at the same time give a better result.

For black and white originals, I think the best next step is to convert the scanned image to black and white and correct for brightness and contrast. It is at this stage that the benefit of scanning in colour becomes evident as it is possible to check the separate colour channels and decide which one forms the best basis for the conversion. Colour originals are colour corrected.

By correcting the image first, renovation becomes much easier as the background detail is much clearer. The last step is to retouch the image – removing all the marks and rebuilding missing areas. This is where the magic happens and will be the subject matter for future blogs.

I guess the photo restoration process is whatever works for you. This one certainly seems to work for me.

Posted in Photo Renovation | Tagged , | 4 Comments

Improvement and Renovation

All prints, film negatives and slides deteriorate over time and they can also get damaged through years of storage which may lead to mould growth or unwanted creases and tears. We can take away those years of deterioration and damaged areas that occur from regular handling or accidental spills, such as water marks and scratches.

We offer a digital image improvement service. For important photos that haven’t turned out the way you want (for example, wrong exposure or poor composition), we can improve the image removing an unwanted object, improving the overall composition or re-touching areas that don’t meet your expectations

Every photo renovation or image improvement project is different, send us your image by email and we can discuss the possibilities

Posted in Photo Renovation | Tagged , | Leave a comment

Working with the environment

We have always had a strong commitment to the environment and use ecologically sound products and suppliers wherever possible. These include recycled paper for our communication and business stationery and we continue to source new products and materials such as inks and toners to further reduce our environmental impact.

We are currently testing two of Hahnemühle’s latest fine art papers using environmentally sound raw products, one uses bamboo fibre and the other bagasse fibre which is a combination of a by-product of sugar production and cotton. We will let you know the results soon.

Our studio energy supplier is Ecotricity who produce their energy from renewable resources and we are investigating installing photovoltaic cells to generate our own electricity to further minimise our environmental impact.

Posted in Environmental Policy | Tagged , | Leave a comment